Single-Sign-on
Single Sign-on (SSO) is a one-step user authentication process. If you are the admin of an IDrive® e2 account, you can enable your users to access IDrive® e2 by signing in to a central identity provider.
You can use any IdP of your choice to process all user authentications. This simplifies the sign-in experience by allowing users to login to multiple systems with just one set of credentials.
IDrive® e2 currently supports the following features for SSO:
- SP-initiated SSO
- IdP-initiated SSO
- SCIM User provisioning
As an admin, you can enable your users to access IDrive® e2 by signing in to a central identity provider. To set up SSO with IDrive® e2, you need first to configure your identity provider and then configure SSO in IDrive® e2.
To configure SSO,
- Sign in to IDrive® e2 with your email address and password.
- Navigate to the 'Dashboard' > 'Settings' > 'Single Sign-On (SSO)''.
- Enter a name for your SSO profile.
- Enter the Issuer URL and SSO Endpoint.
-
Upload the X.509 certificate received from your IDP.
Note: X.509 certificate should only be in .pem, .txt, .cer, and .cert format. -
Click 'Configure Single Sign-On'.
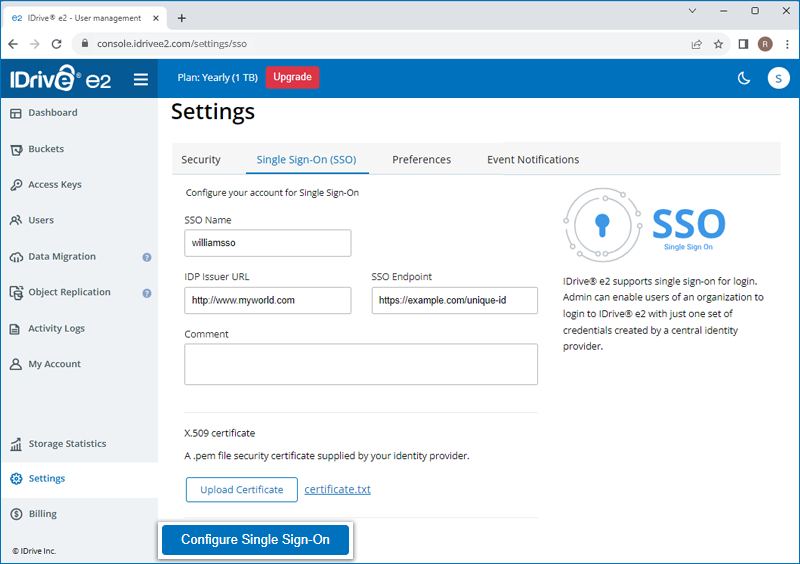
You will receive an email when SSO is enabled.
Yes, you can configure your own identity provider for SSO along with a set of parameters as described below:
- IDrive® e2 uses SAML 2.0 with the HTTP Redirect binding for IDrive® e2 to IdP and expects the HTTP Post binding for IdP to IDrive® e2.
- While configuring with SAML, use the two following URLs and save the changes.
- Single sign on URL: https://api.idrivee2.com/api/sso/samlassert
- Audience URL (SP Entity ID): https://api.idrivee2.com/api/sso/metadata.xml
- Your identity provider may ask whether you want to sign the SAML assertion, the SAML response, or both. IDrive® e2 requires the SAML response to be signed.
You can choose a signed or unsigned SAML assertion.
Admin of the IDrive® e2 account can enable SSO while inviting users. Alternatively, the admin can enable SSO for the existing users.
To enable SSO for new users,
- Sign in to IDrive® e2 with your email address and password.
- Go to 'Users' > 'Invite User'.
- Enter the email addresses of the users you want to invite. You can invite a maximum of 10 users at a time.
Note: An invite will be sent to these email addresses for creating an account. - Select the 'Make as admin' checkbox to grant users administrative privileges. All users with admin permissions can manage buckets, access keys, and users
- Select the 'Enable SSO' checkbox.
Note: If you select the checkbox, you won't be able to set the password.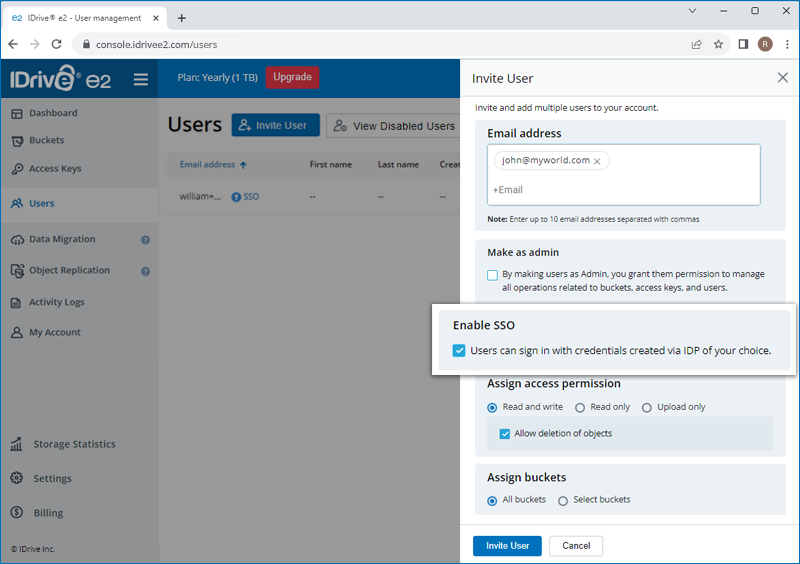
- Select access permission for the users i.e. 'Read and write', Read only', or 'Upload only'.
- Allow access to all buckets or select the buckets to allow access.
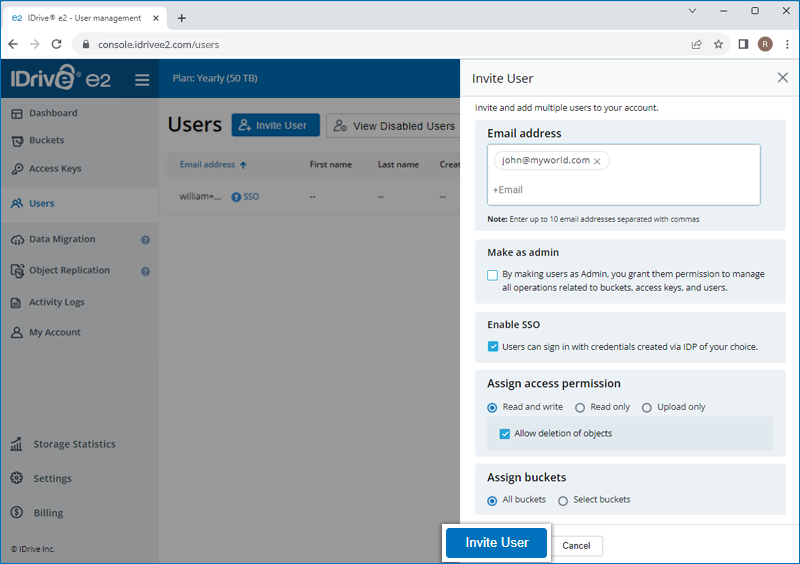
- Click 'Invite User'.
To enable SSO for existing users,
- Sign in to IDrive® e2 and go to 'Users'.
- Hover on the user you want to enable SSO, and click
 .
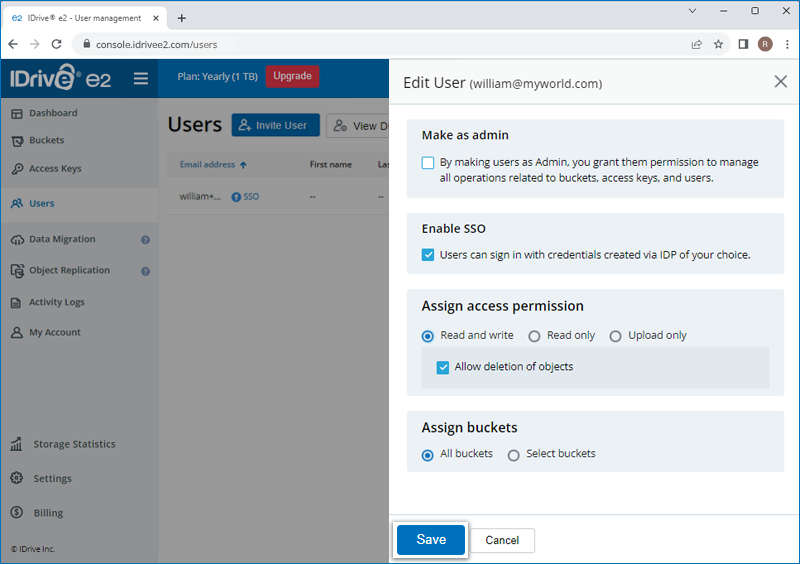
. - Select the 'Enable SSO' checkbox.
- Click 'Save'.
To disable SSO for users,
- Sign in to IDrive® e2 and the 'Users'.
- Hover on the user you want to edit and click
 .
. - Deselect the 'Enable SSO' checkbox.
- Click 'Save'.
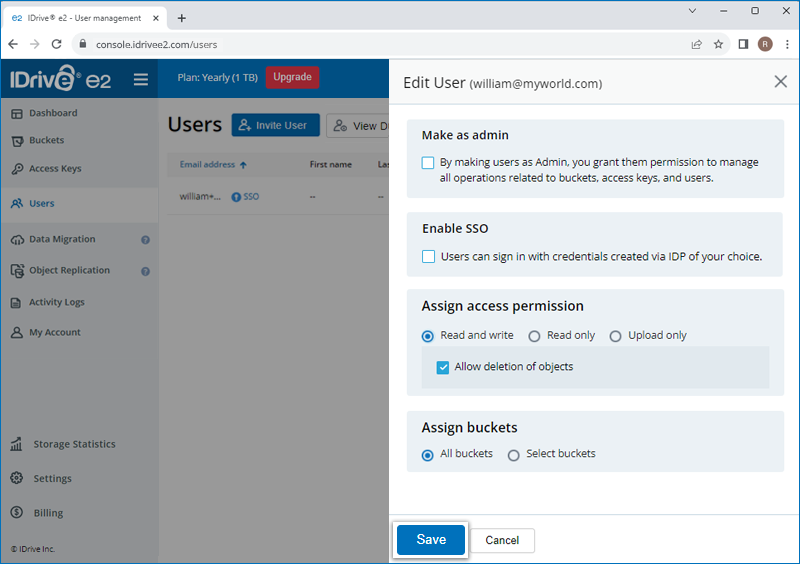
A user will be intimated by an email informing that SSO for their account has been disabled. Now they must sign in to IDrive® e2 using their email address and password.
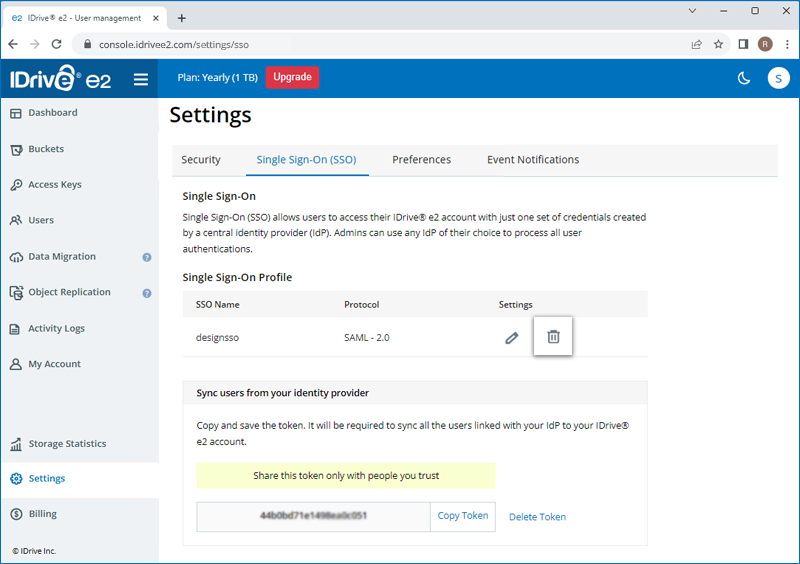
To delete an SSO profile,
- Sign in to IDrive® e2.
- Navigate to the 'Dashboard' > 'Settings' > 'Single Sign-On (SSO)'.
- Click
 corresponding to the SSO profile you wish to delete.
To generate a token for syncing contacts,
- Sign in to IDrive® e2 via a web browser.
- Navigate to the 'Dashboard' > 'Settings' > 'Single Sign-On (SSO)''.
- In the SSO section, click the 'Generate Token' button under 'Sync users from your identity provider' to generate a token.
- Click the 'Copy Token' button to copy and save the token for future reference.
The token will be required to sync all the users linked with your IdP to your IDrive® e2 account.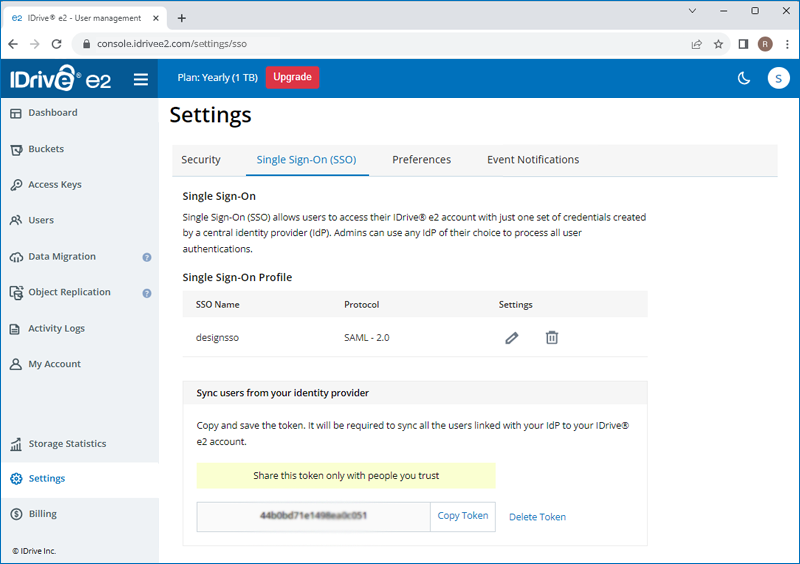
- Configure the following SCIM User provisioning URL in your IdP:
https://api.idrivee2.com/api/sso/user_provisioning
To login via SP-initiated SSO,
- Go to IDrive® e2 sign in and click Sign in to SSO account.
Alternatively you can go to https://console.idrivee2.com/sso/login. - Enter your email address and click Sign in.
To login via IdP-initiated SSO, you must log in to your IdP dashboard and select IDrive® e2.
Yes, you can use Identity Providers (IdPs) like OneLogin and Okta to configure Single Sign-On (SSO).