1-Step Restore
Restore your full computer — including the operating system — using the entire machine backup folder created through the IDrive® 360 desktop application. The one-step restore feature rebuilds your complete system by using the backed-up boot files stored in the cloud. This helps you seamlessly return the OS to its earlier state, preserving the same partition layout as the original machine. You can also restore the backup to another computer, whether the hardware is identical or different.
To perform an entire machine restore, you must first create a bootable USB hard drive. Follow the steps in the referenced FAQ to build a WinRE bootable media with wireless Wi-Fi support.
Steps to recover your entire machine backup — including the OS — to similar or dissimilar hardware using the IDrive® 360 Desktop Application
To restore the entire machine to an external disk, download and double-click the WinRE ISO file to mount it. Copy all files to a USB bootable flash drive and proceed with the steps below:
- Ensure these prerequisites:
- USB bootable flash drive to boot your machine.
- Download WinRE ISO file and double-click to mount it.
- Copy all the data to the USB flash drive.
- Connect the WinRE boot disk (USB bootable flash drive) to the computer.
- Boot the computer from the USB device to enter the Windows Recovery Environment. The Entire Machine Restore wizard will appear.
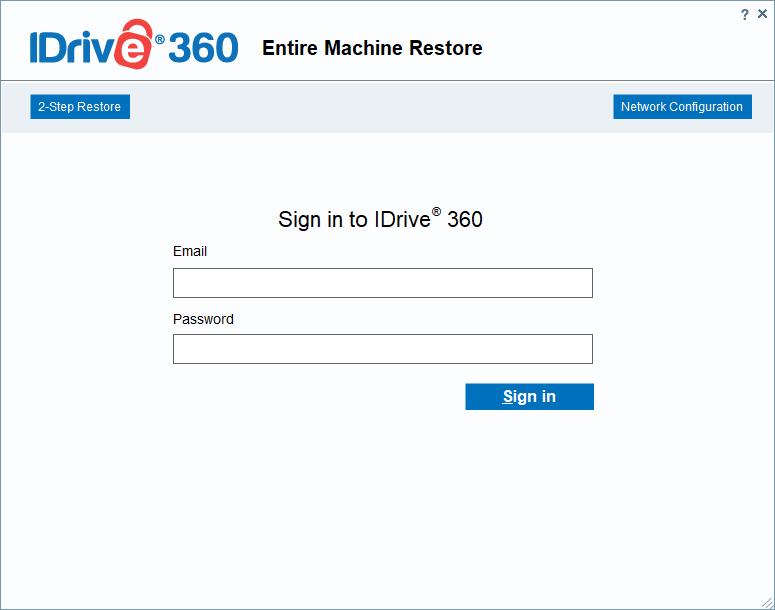
- Sign in to your IDrive® 360 cloud backup account. If your account uses private encryption, you will be prompted for the private key. Enter the key to continue.
- Go to Online Restore, Local Restore, or IDrive® 360 Express™ and select the entire-machine-backup folder (IDMachineBackup).
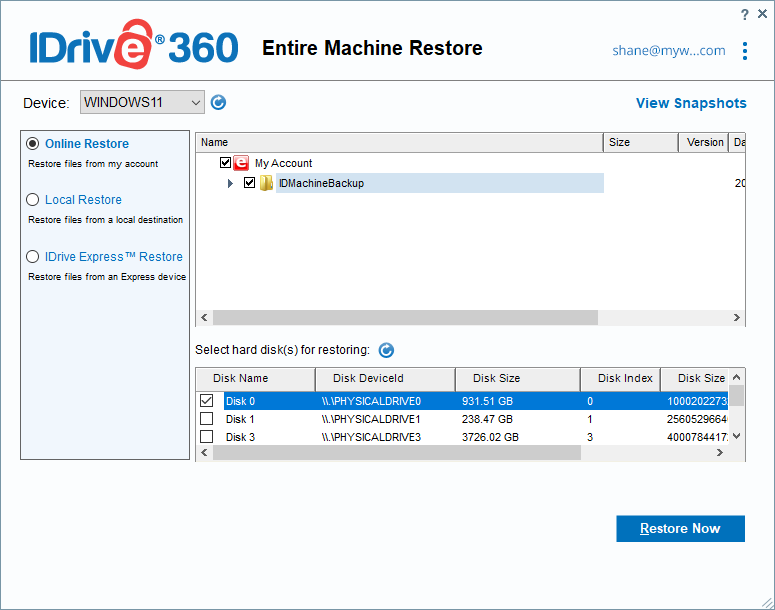
- Select the hard disk where you want to restore the entire machine-backup folder.
- Click Restore Now.
- Press Windows key + R to open the Run dialog.
- Type wsreset.exe (without quotes) and press Enter.
- A Command Prompt window will appear briefly, followed by the Microsoft Store opening.
- Wait for the reset to complete, then restart your computer.
Note: You may also restore the IDMachineBackup folder from a network location. Select Local Restore and choose the required network path. Click Verify access to a network location for backup. In the Network Details window, enter the UNC path (\\IP Address or Computer name\dir) for the NAS or network share, along with your username (domain\username) and password. Click Validate.
A confirmation prompt will appear stating that the restore will overwrite all existing data on the selected drive. Click Yes to continue.

You can monitor the restore progress in the Entire Machine Restore window. Once complete, select the restored drive in BIOS and boot the computer to load the operating system.
Note: After the restore is complete, install the necessary Windows OS updates on the recovered system.
For Windows 11 – Microsoft Store update
After restoring the computer, follow these steps:
Network configuration
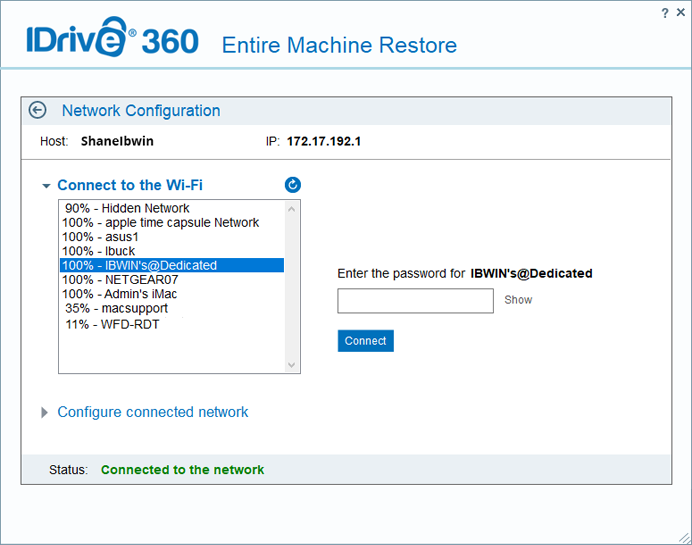
An active internet connection (Wi-Fi or Ethernet) is required to download the IDMachineBackup folder.
To connect to Wi-Fi:
- Go to Network configuration and click ‘Connect to Wi-Fi’.
- Select the Wi-Fi network.
- Enter the password and click Connect.
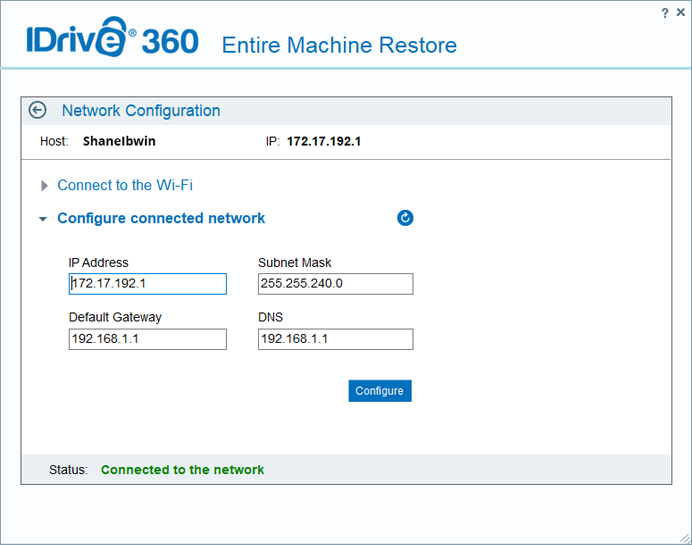
You can configure your network connection in the same way to enable downloading of the IDMachineBackup folder.
Note:
- Recovery Limitations: Full system restoration may not succeed in all scenarios. Differences in hardware, issues with boot files, RAID configurations, or other unforeseen conditions may cause the restore to fail. A successful backup does not guarantee an identical system restore in every situation.
- Alternative Recovery Options: If the full system restore is unsuccessful, you can still retrieve individual files and folders from your backups to ensure essential data remains accessible.
- Preventive Recommendation: Users should regularly test their backups and verify compatibility with their system hardware to reduce potential restore complications.