User guide: Restoring a physical machine as a new VM in ESXi Server
This guide explains how to restore a Windows Entire Machine Backup (EMB) as a fully operational Virtual Machine (VM) on a VMware ESXi host using the IDrive® 360 application. Whether you are recovering from hardware failure, moving to a virtual infrastructure, or creating a test environment, this process enables you to quickly bring back your full system — including the OS, applications, settings, and data — with minimal downtime.
1. Prerequisites
Before starting the restore procedure, confirm the following requirements:
- Access to VMware ESXi Host
You must have valid credentials to log into the ESXi host via the vSphere Client or Web Client. - Available Entire Machine Backup
A complete online Entire Machine Backup must exist in your IDrive® 360 account. - Download the state.xml File
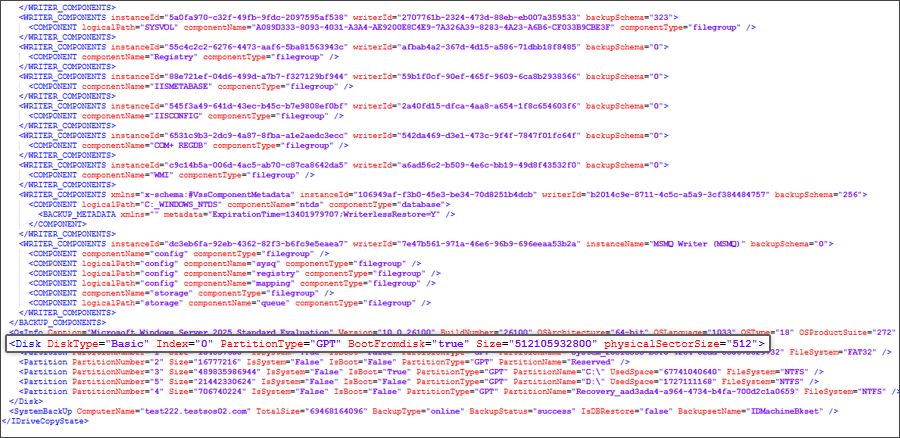
This configuration file identifies the OS details and partition type.
Path: IDMachineBackup → <MachineName> → state.xml. - Download the System Recovery ISO
Obtain the SystemWinRE.iso used for system recovery.
Select the correct ISO version (GPT or MBR) based on the partition information in the state.xml file.
Download ISO for GPT Partition
Download ISO for MBR Partition - Sufficient ESXi Resources
Ensure your ESXi host has adequate storage, CPU, and memory to provision the new VM.
2. Restore process
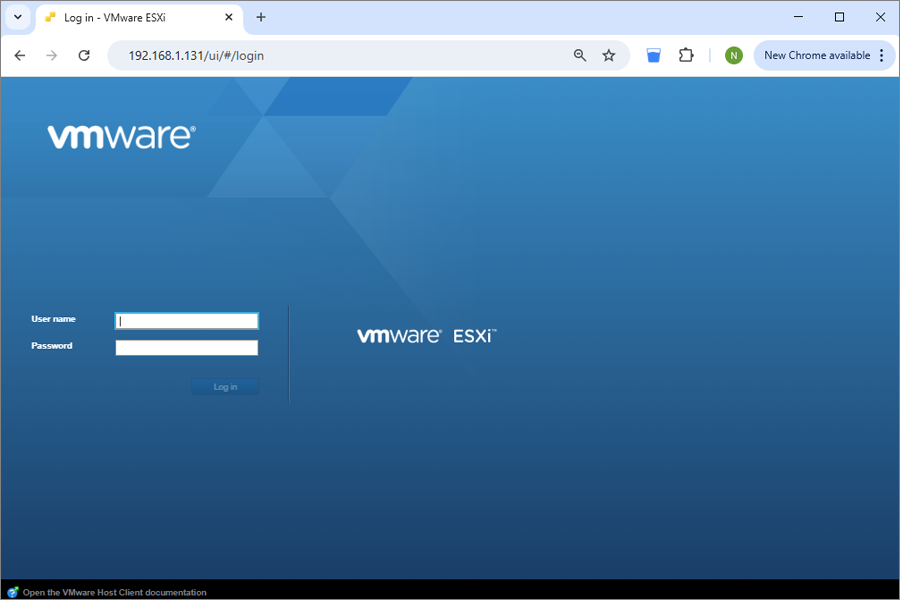
2.1 Access the ESXi host
- Sign in to the ESXi host using the vSphere Client or Web Client.
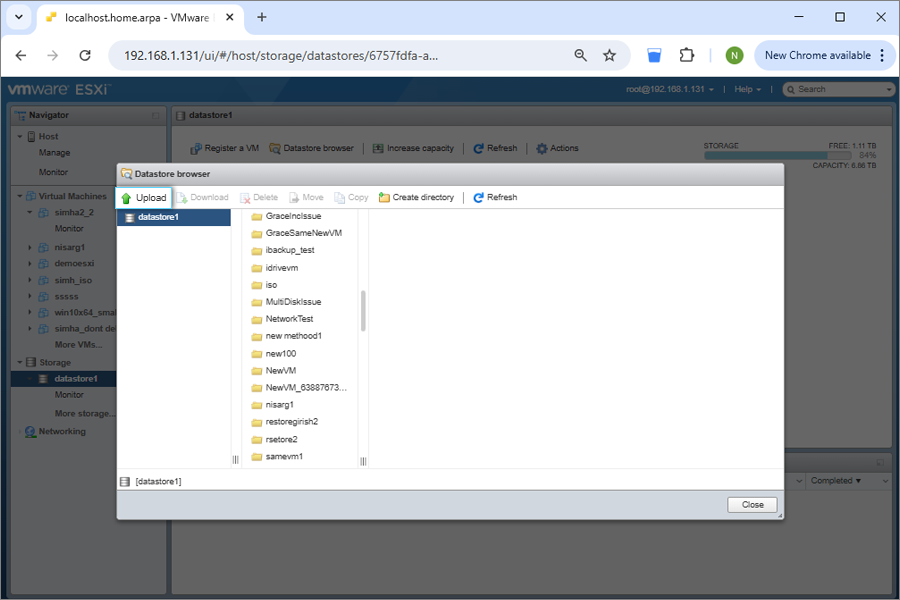
2.2 Upload the System Recovery ISO
- Download the appropriate SystemWinRE.iso.
- Upload it to the ESXi datastore:
- Go to Storage > Datastore browser > Upload.
- Select and upload the ISO file.
- Select and upload the ISO file.

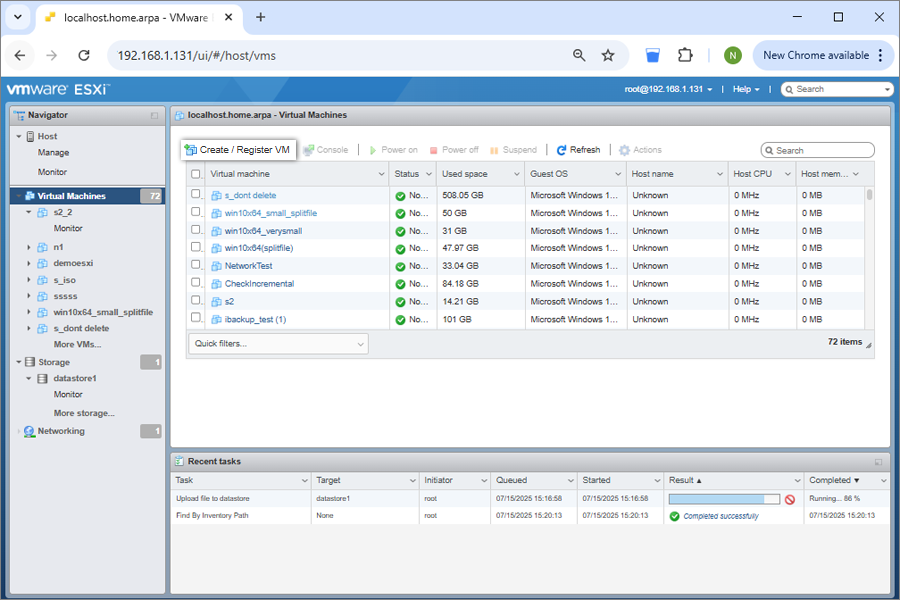
2.3 Create and configure a new virtual machine
- Enter a name for the virtual machine.
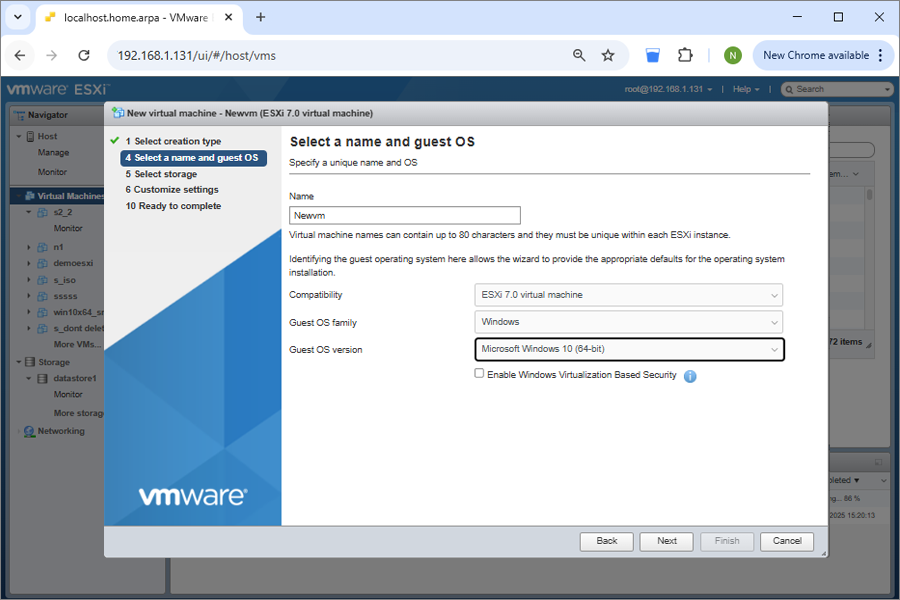
- SSelect the Guest OS type that matches the Windows version listed in state.xml.
- Choose the target datastore.
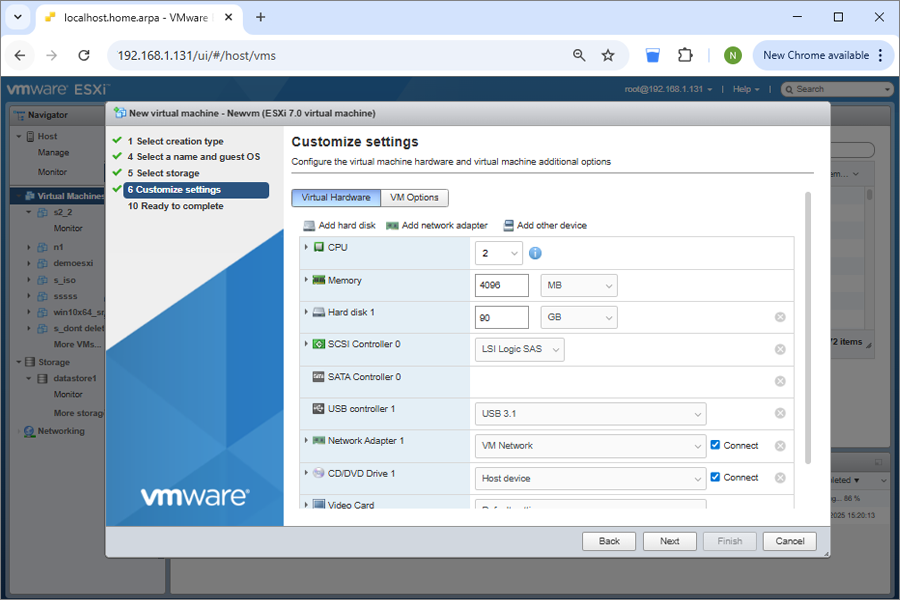
- Configure the virtual hardware.
- Create a virtual hard disk (equal to or larger than the disk size listed in state.xml).
- Under CD/DVD Media, browse and attach the downloaded SystemWinRE.iso.

- Adjust the firmware settings according to the partition type in state.xml:
- MBR: Set firmware to BIOS
- GPT: Set firmware to EFI

- Disable UEFI Secure Boot.
- Review the VM summary and click Finish.
- Before powering on, go to VM Settings > VM Options > Boot Options and apply the correct firmware.
- Click Save.
3. Boot and restore using IDrive® 360
- Power on the newly created VM.
- The VM will start in the IDrive system recovery environment.
- Restore the backup from your IDrive® 360 cloud account or from an external HDD attached to the ESXi host.
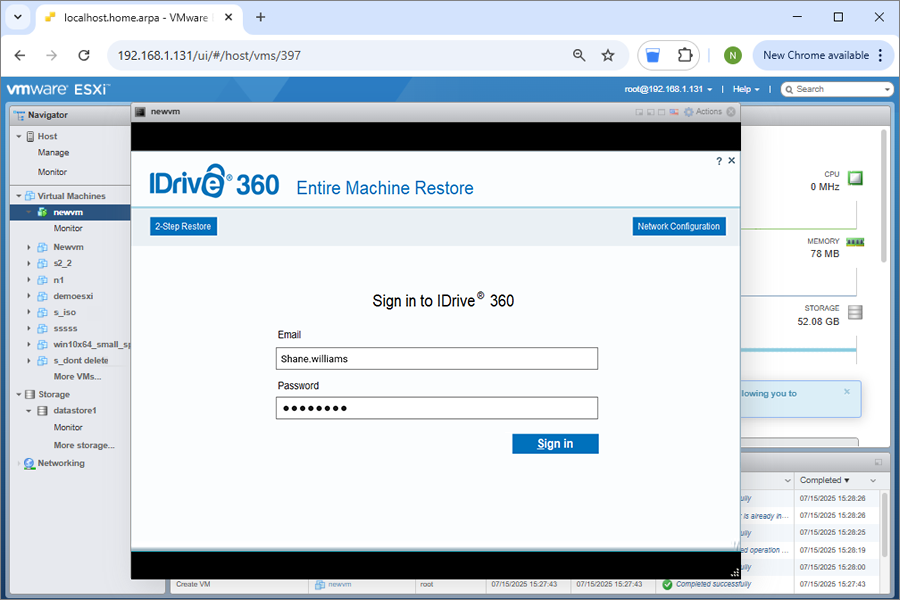
3.1 Restore from IDrive® 360
- Sign in to your IDrive® 360 cloud account in the recovery window.
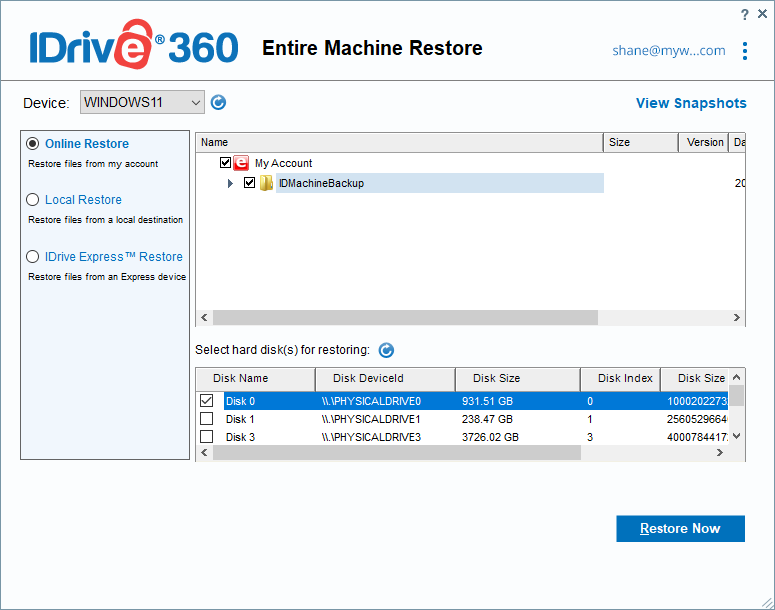
- Select Online Backup and choose the correct machine/device.
- Browse to the IDMachineBackup folder.
- Select the disk(s) you want to restore.
- Click Restore Now to begin.
- You may restore using either method:
- 1-Step Restore: Learn More
- 2-Step Restore: Learn More
4. Post-Restoration Steps
- After the restore completes, shut down the VM.
- In VM Settings, change the CD/DVD device from the ISO to Host Device.
- Power on the VM to boot from the restored system disk.
5. Important Notes
- Always begin with a valid and complete Entire Machine Backup.
- Verify that your ESXi host has enough resources — CPU, RAM, storage, and network connectivity.
- Ensure the correct partition type (MBR or GPT) and matching firmware (BIOS or EFI) are selected as per the state.xml file.
6. Compatibility
- Supported Windows Versions: Windows 8.1 and later.
- Supported VMware ESXi Versions: ESXi 6.5 and above
Passthrough USB/External Drive to an ESXi Virtual Machine
Make a USB or external drive available directly inside an ESXi VM using these steps:
1. Connect the HDD
Plug the external USB drive into the physical ESXi host.
2. Select the VM
In the vSphere Client, open the virtual machine that needs access.
3. Edit Settings
Right-click the VM → Edit Settings.
4. Add USB Hardware
Click Add other devices, then select USB Device.
5. Select and Attach
Choose the connected USB HDD and click OK.
The drive will now appear inside the VM.
Steps to Read a state.xml File to Determine Disk Size and Partition Type for VM Creation
- Download the state.xml file from the Entire Machine Backup set.
- Open state.xml in Notepad.
- Locate the Disk section and find DiskType and Size.
- Convert the size value into GB when configuring the VM.
- Create the VM in ESXi using the identified disk size and partition type, then proceed with the restore.