Integrate MSP360 Managed Backup Service with IDrive® e2
MSP360 Managed Backup Service (MBS) provides an advanced data backup and restore solution for managed service providers and IT departments. It offers centralized job management, monitoring, reporting, and licensing features. You can use MSP360 Managed Backup Service (MBS) with IDrive® e2 to automate and secure server backups offsite. Learn more about MSP360 Managed Backup Service.
Prerequisites:
Before uploading files using MSP360 Managed Backup Service, you require:
- An active IDrive® e2 account. Sign up here if you do not have one.
- A bucket in IDrive® e2. See how to create a bucket.
- A valid Access Key ID and Secret Access Key. Learn how to create an access key.
- A valid license for MSP360 Managed Backup Service.
Add a New Storage
- Download and install MSP360 MBS. Sign In to the MBS web interface using your MBS credentials.
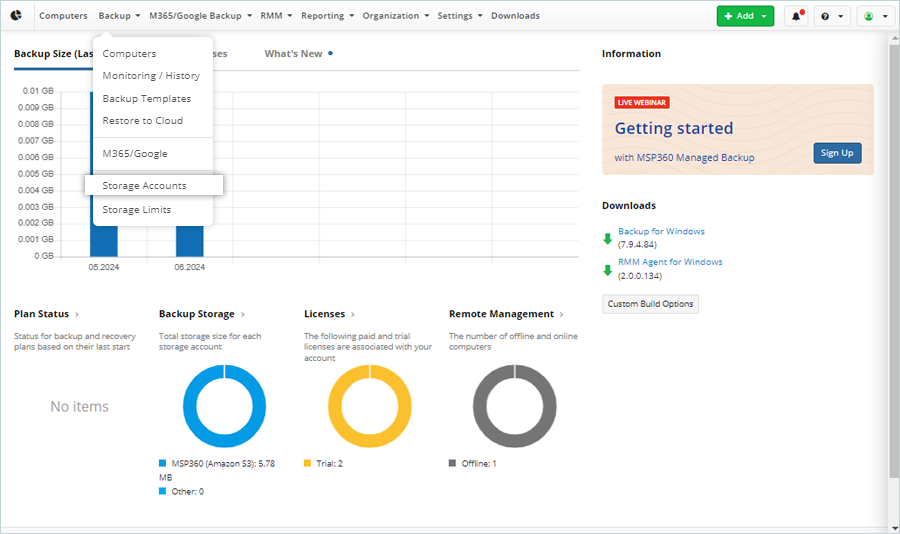
- Navigate to Backup > Storage Accounts.
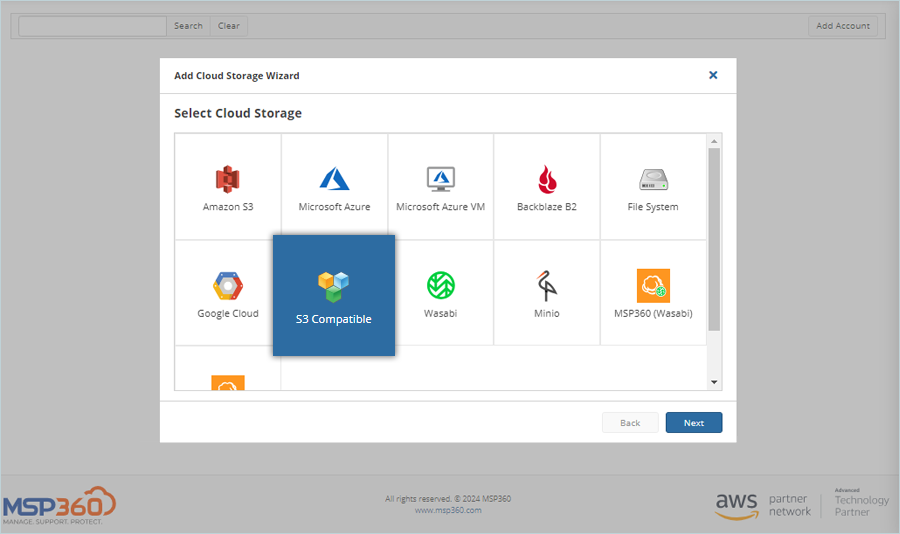
- Select S3 Compatible as Cloud Storage and click Next.
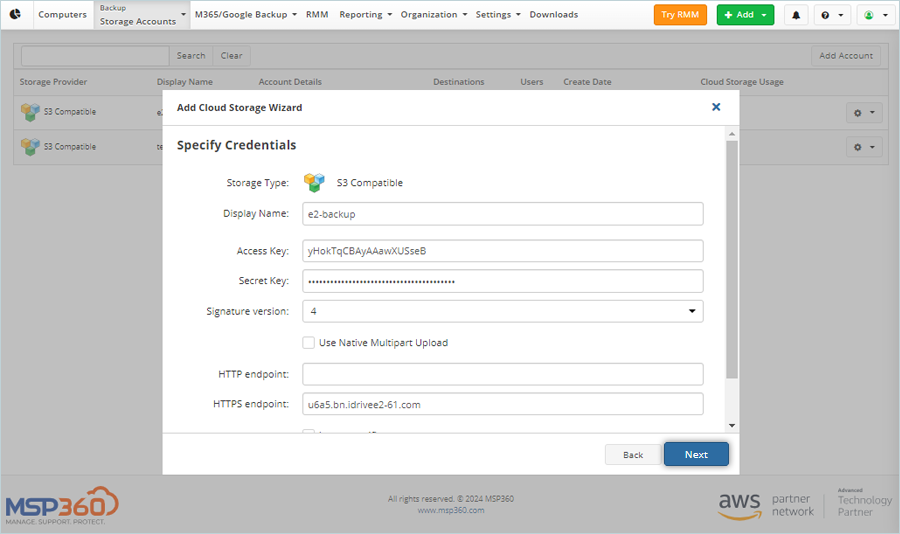
- Enter the IDrive® e2 storage credentials.
- Enter Display name for cloud storage.
- Enter IDrive® e2 Access Key as the Access Key.
- Enter IDrive® e2 Secret Access Key as the Secret Key.
- Select the Signature version as 4
- Enter IDrive® e2 storage endpoint as an HTTPS endpoint.
- Click NEXT.
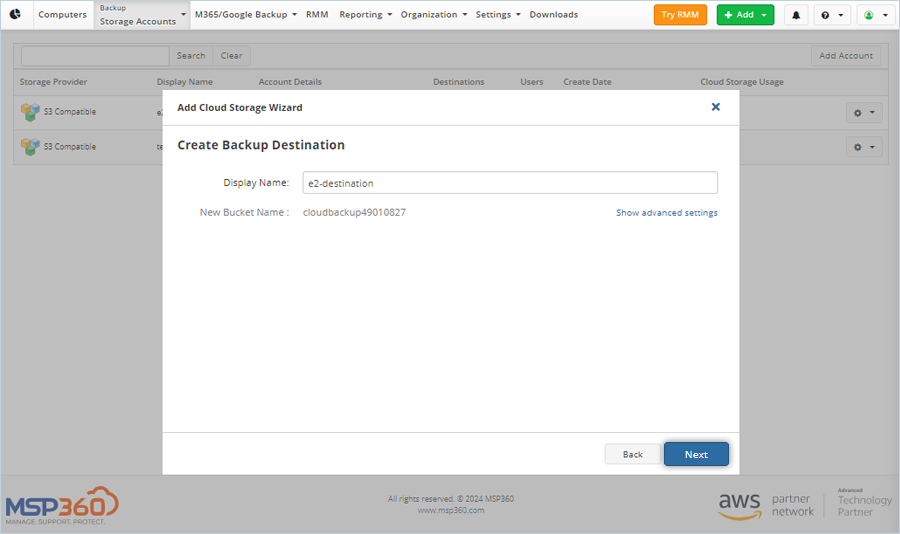
- Enter a Display Name for Backup Destination and click Next (Keep bucket name as default).
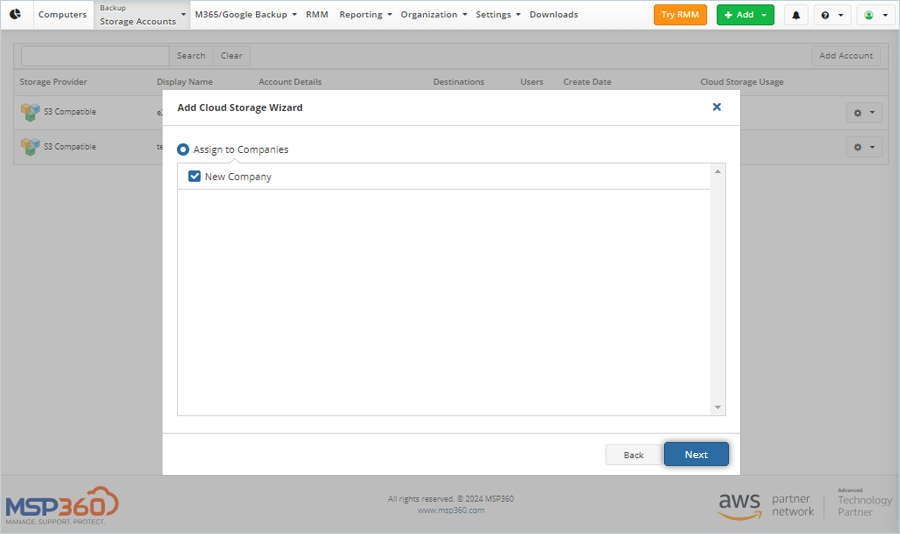
- Select Default Company as New Company and click Next (The user can create a new company also).
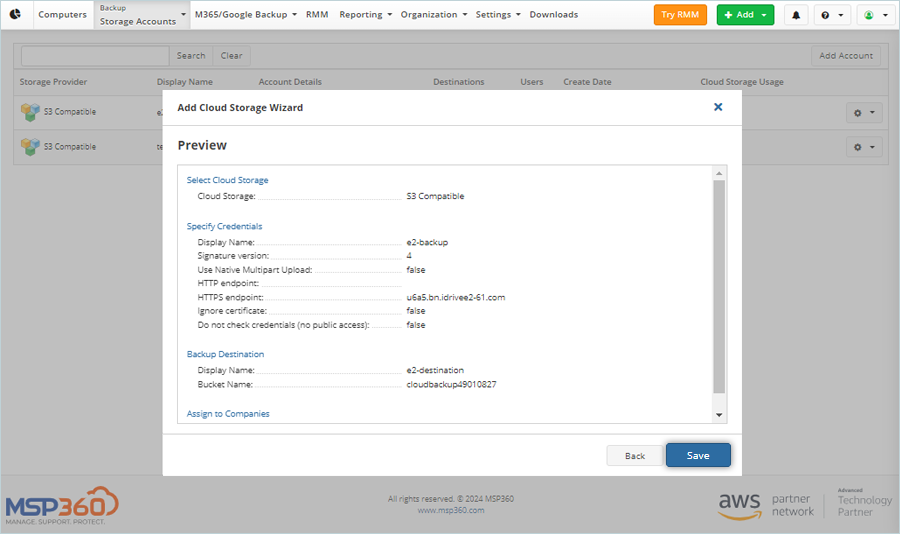
- Preview the added storage and click Save.
Add Computer and Install Backup Server
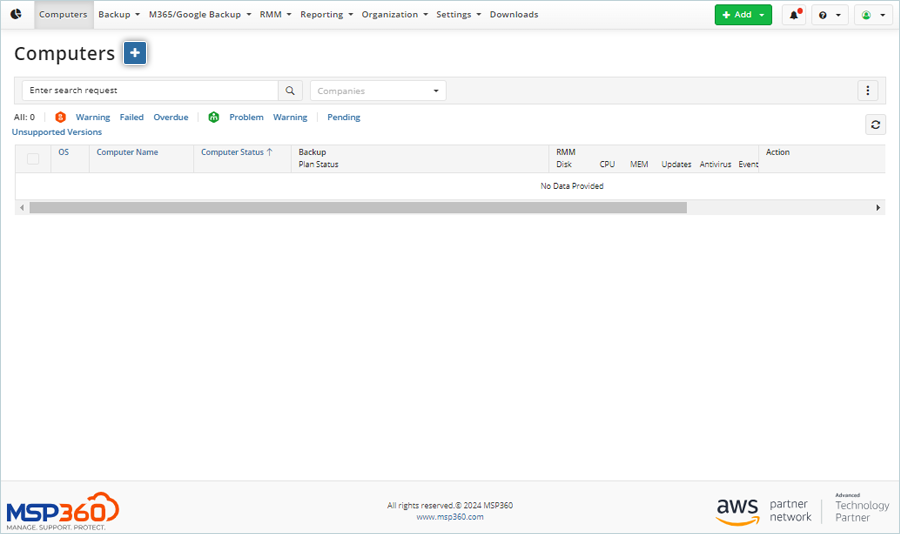
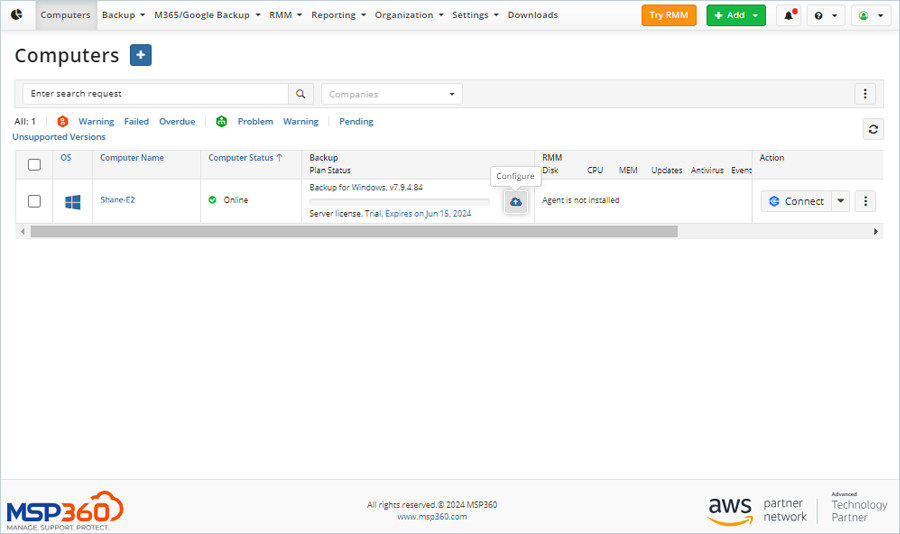
- Navigate to Computers and click
 to add a new computer.
- In the Pre-Configuration tab.
- Select Backup as a Product.
- Select Windows as a Platform.
- Select New Company as a Company.
- Click Next.
- In the Download and Install tab, click Download to download the backup server.
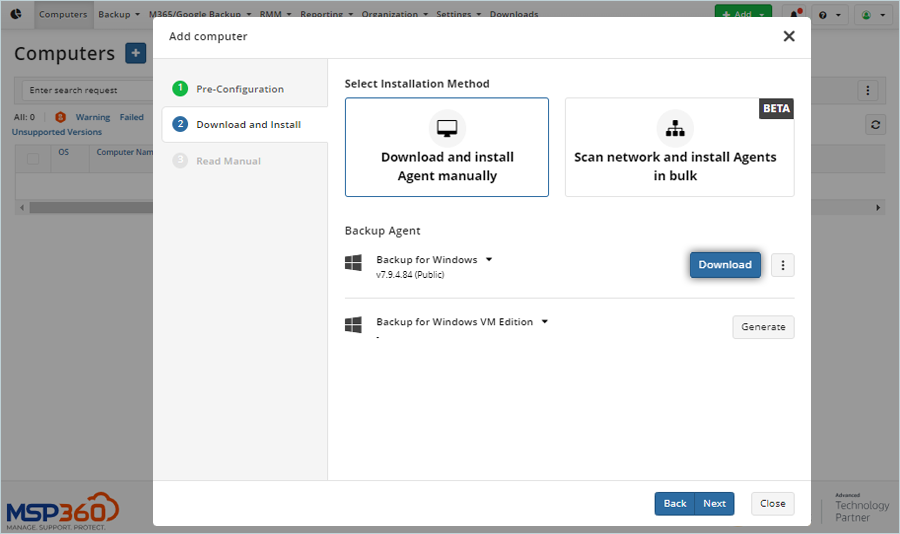
Note: After downloading, install the backup server application. After successful installation, the cloud storage will be accessible on the backup server.
Configure Backup with plans
- Refresh the Computers list after installing the backup server.
- Click
 on a particular computer.
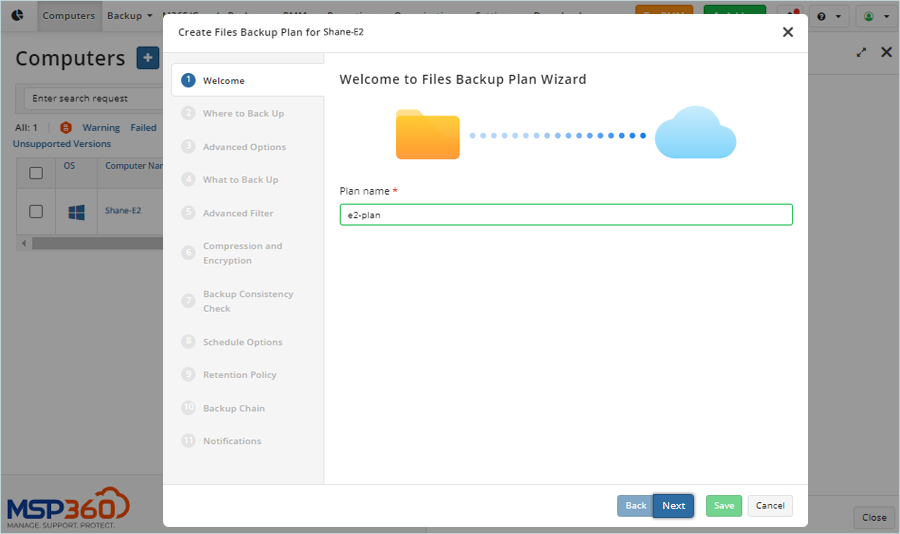
- Select Backup Plans and click Add New Plan in the computer configure window.
- Select Files Backup Plan from the list.

- Enter Plan name and click Next.
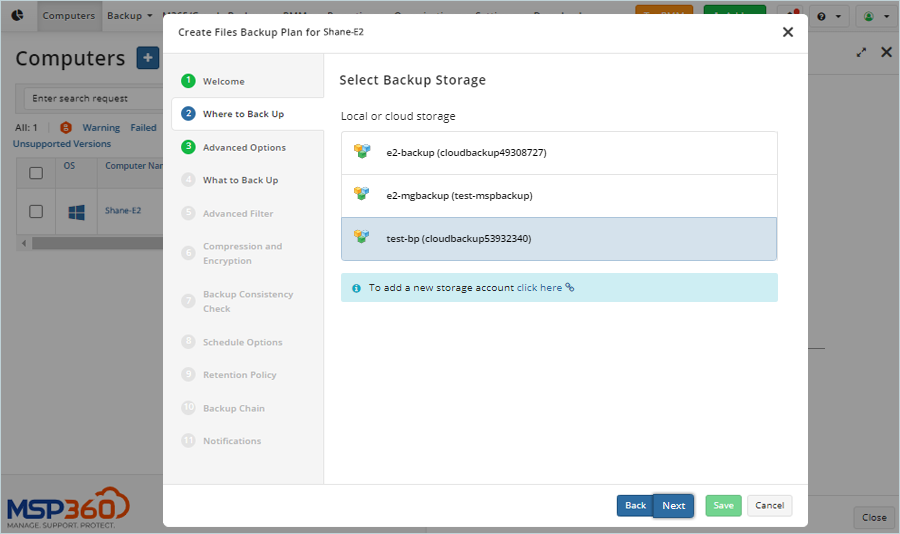
- Select added cloud storage from the list as Backup Storage and click Next.
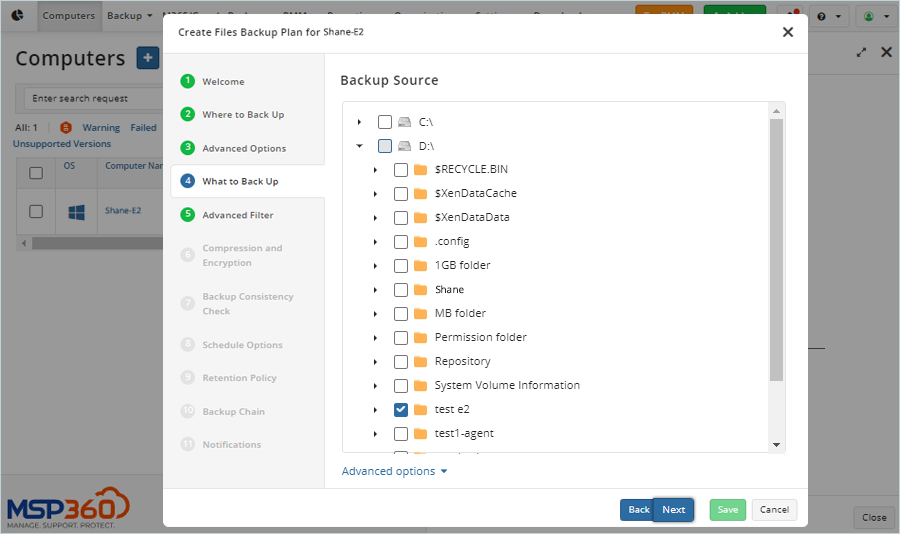
- Select Backup Source from the local drive and click Next.
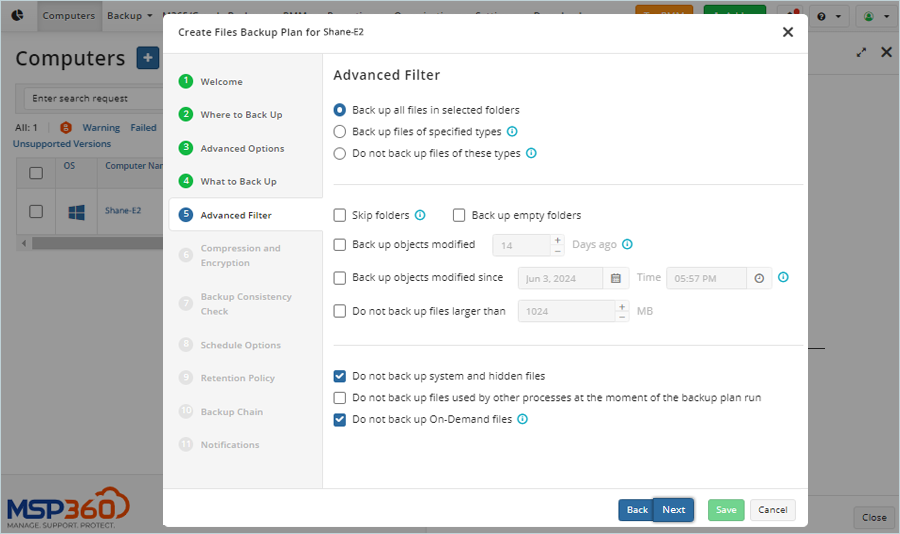
- Select Advanced Filters as required and click Next.
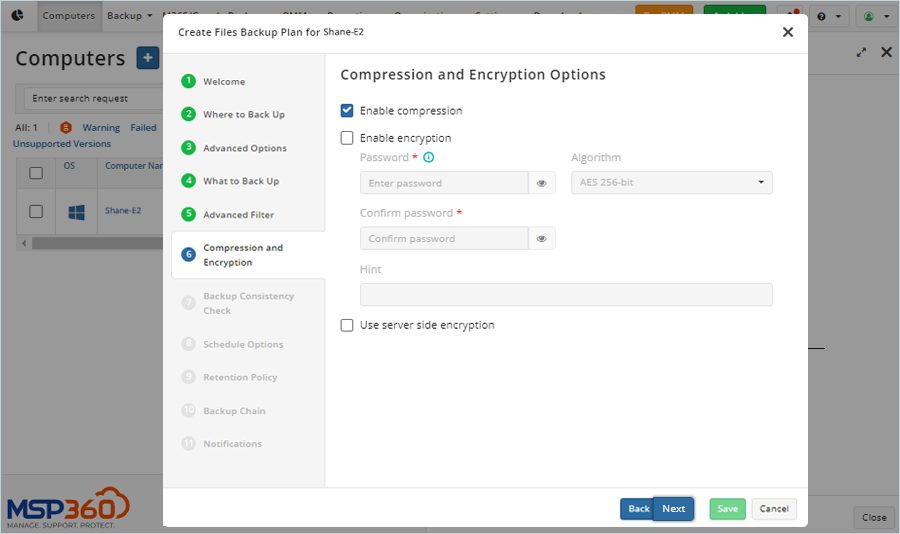
- Select Compression and Encryption Options and click Next.
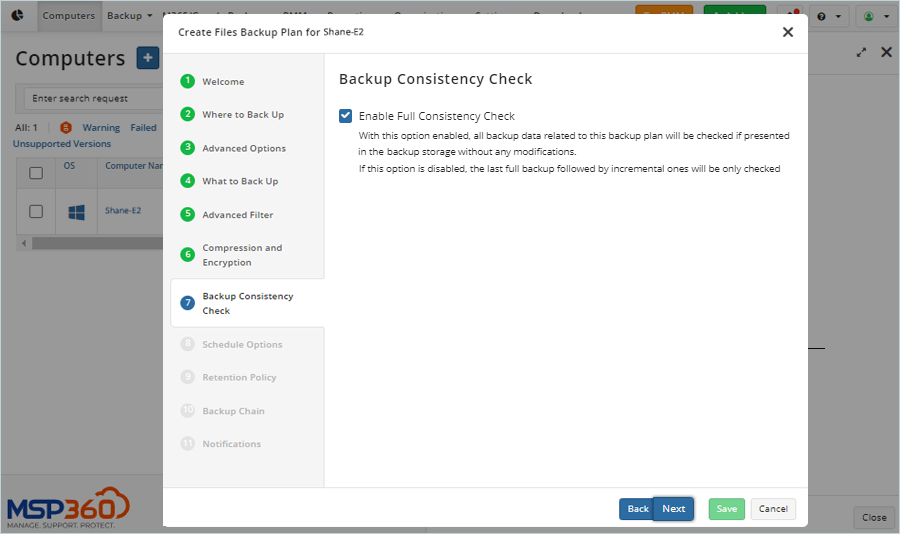
- Enable Backup Consistency Check by selecting the checkbox and clicking Next.
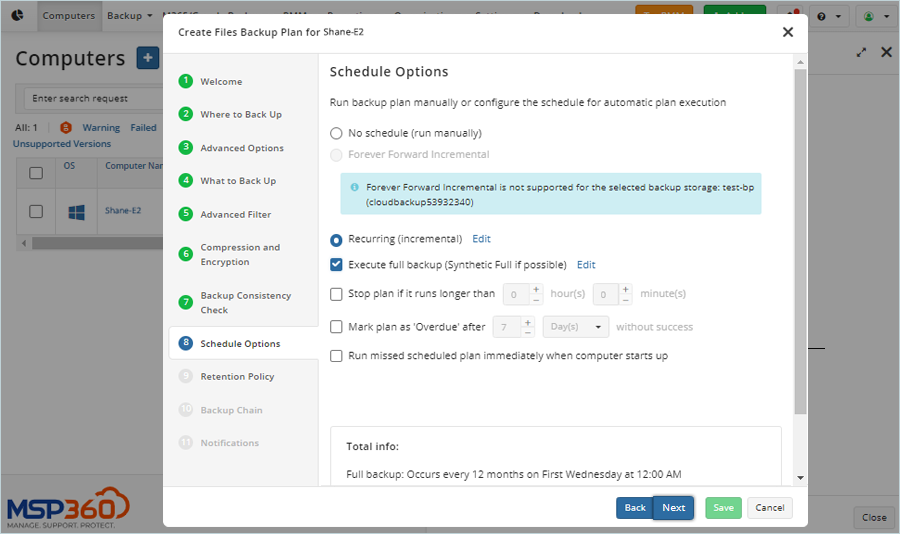
- Set a backup schedule as per requirement and click Next.
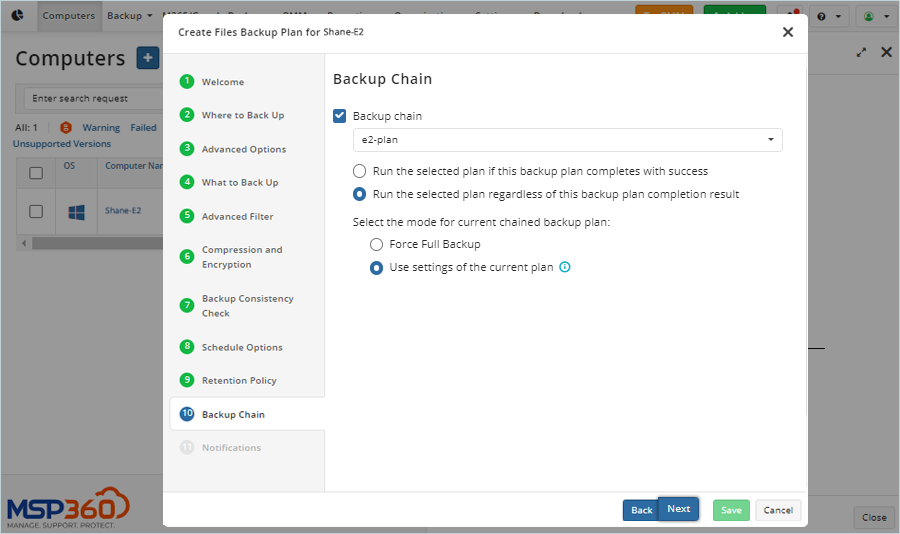
- Select Backup Chain and click Next.
- Set Notification and Logging as required.
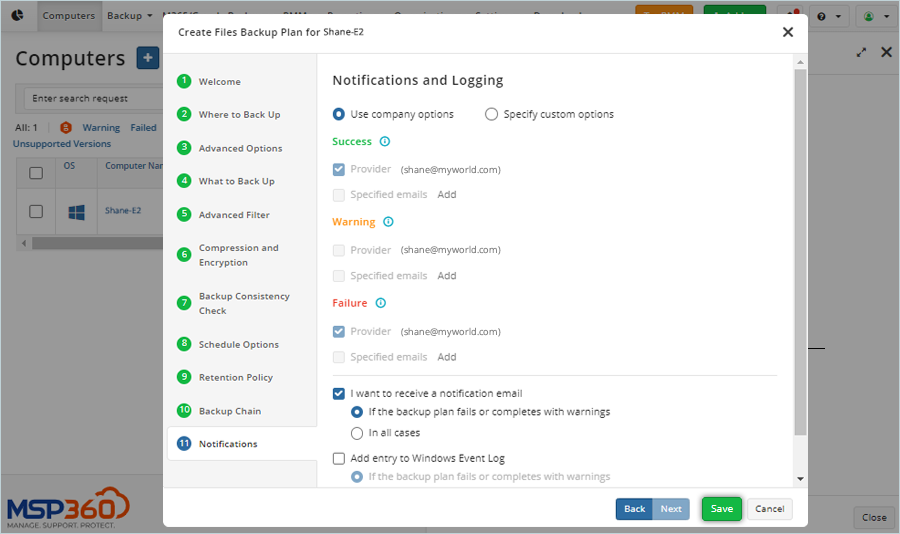
- Click Save.
Run Backup from Back-up Server
- Backup plans will be listed in the backup server app after saving plans.
- Select the backup plan and click
 .
.
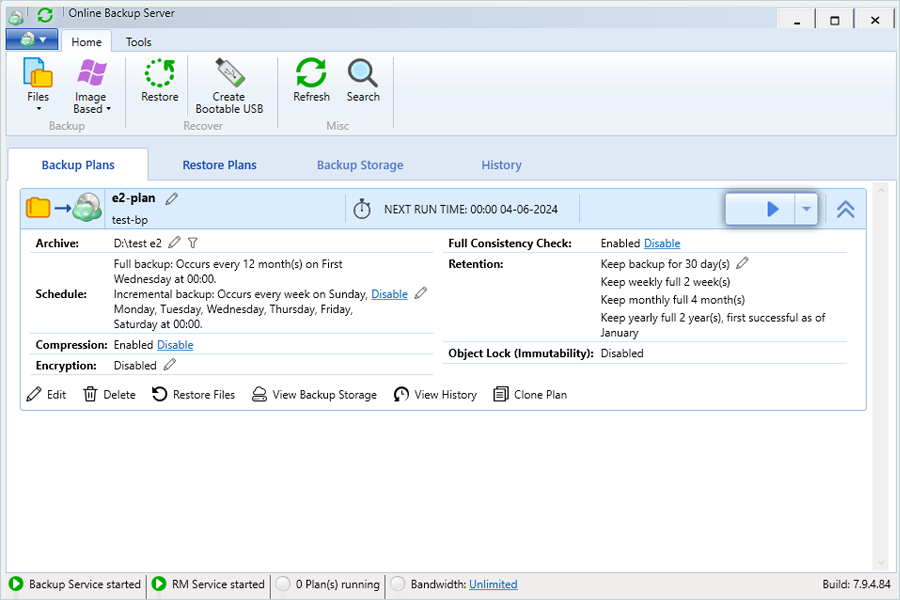
Note: The user can now see complete details of ongoing backup.
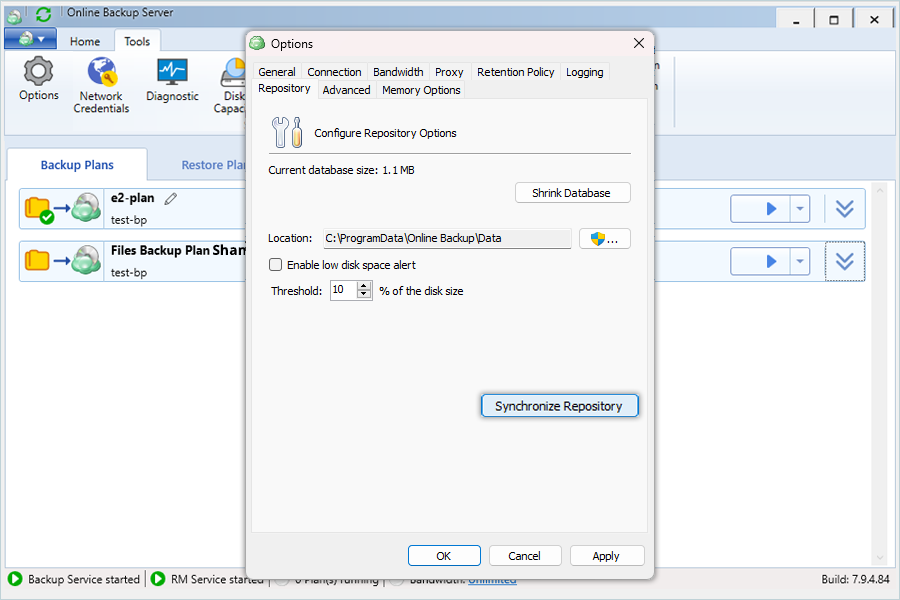
Relink MSP360 Backups after Migrating data to IDrive® e2 from the Cloud
You can easily sync your migrated cloud backup repository to your existing MSP360 files.
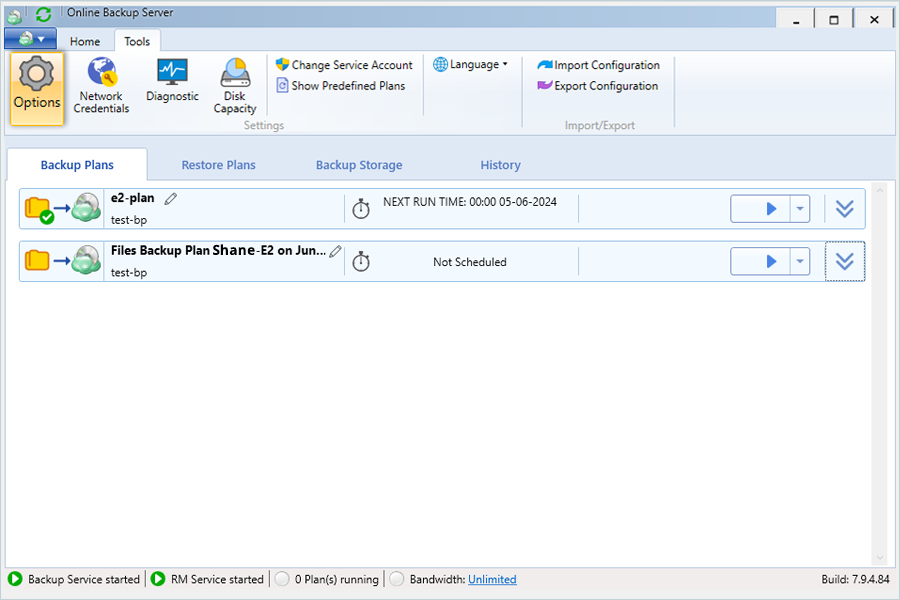
- Open Online Backup Server and click Tools.

- Click Options.
- Select Repository.
- Click, Synchronize Repository.
- Select a backup storage from the drop-down.
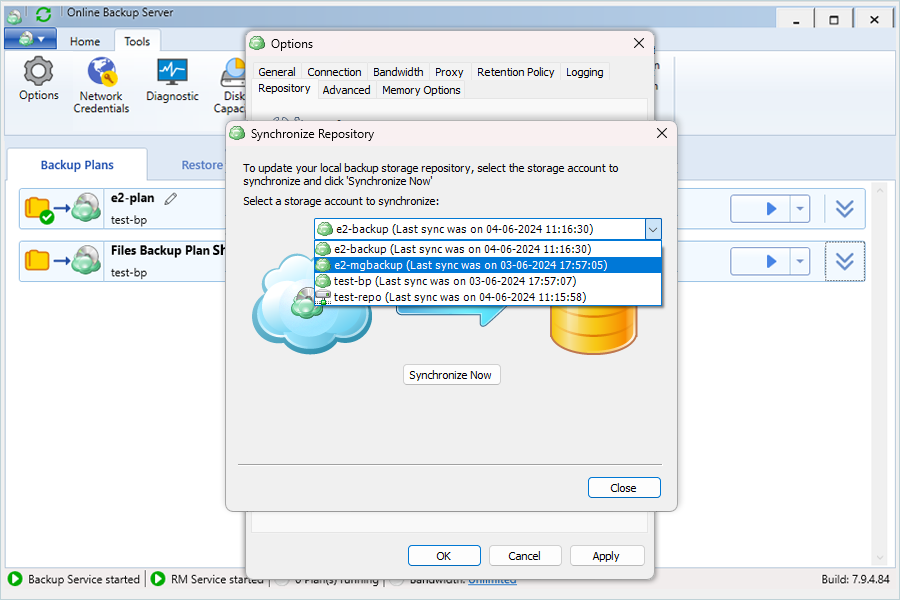
- Click Synchronize Now.
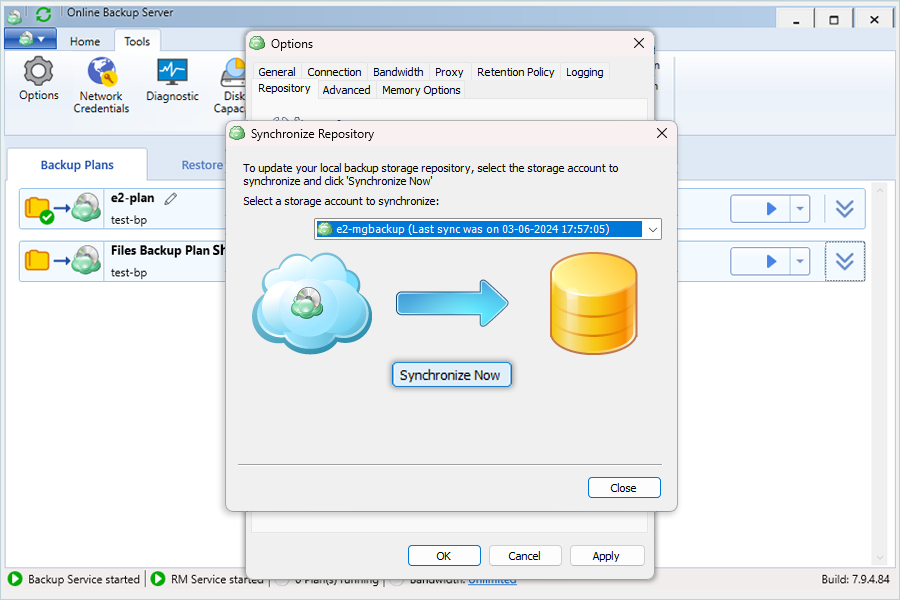
Result: After the update is completed, a message will be displayed. Click Close to proceed.
Note: Data restoration is handled by your specific backup solution provider and is affected by multiple variables that are unique to your environment. For application-related enquiries/support, it is strongly recommended you seek guidance from the technical team of your backup solution provider.